Home > Blog > How to Update Xbox One Controller
How to Update Xbox One Controller
It is vital to keep your controller up-to-date for the awesome experience. We have compiled a list of three easy methods for users to update their gaming controller easily without involving themselves in any trouble.
by Jennifer | Jan 13, 2022
If you’re an owner of Xbox Gaming Console, then it is compulsory to know how to update Xbox One Controller, because Microsoft makes frequent updates to its gaming accessories. Updating these firmware updates would make several improvements, such as enhancing the capabilities of the headset adapter and more. For sure, updating accessories would be a headache for many users, although it’s not required, but thanks to Microsoft who has offered three different methods for users of Xbox One to update their controllers as follows:
· Update Xbox One Controller Using Wireless Method
· Update Xbox One Controller Using a USB
· Update Xbox One Controller using a Windows 10 PC
Surely, you would enjoy better gaming experience after updating the required firmware update as it enhances the controller capabilities to provide you smooth gaming experience; therefore, it is vital to keep your controller up-to-date for the awesome experience. We have compiled a list of three easy methods for users to update their gaming controller easily without involving themselves in any trouble.
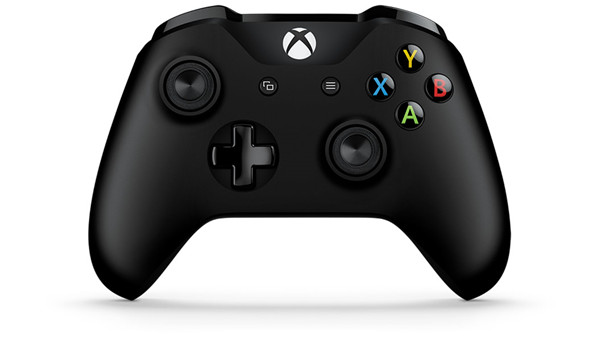
- Update Xbox One Controller Using Wireless Method
- Update Xbox One Controller using a USB Method
- Update Xbox One Controller using Your PC
Update Xbox One Controller Using Wireless Method
Before updating your Xbox One Controller wirelessly, you should confirm when you bought it. You can easily reveal the purchased date by checking the bottom of the controller nearby the round 3.5-mm port. It will indicate that your controller is capable of updating using the wireless method or not.
You can also receive firmware updates by utterly connecting your stereo headset adapter to Xbox One Controller. For the most recent Xbox One Controllers, the simplest and easiest method to set up firmware update is using the wireless connection. You should know that because of hardware limitations, the firmware update functionality is only limited to controllers manufactured during or after the year 2015. You can easily detect them by following the method already mentioned above. Moreover, you should keep in mind that Firmware version numbers may vary between Xbox One Controller Variants.
1. Make sure Xbox One Controller is connected to the Internet
2. “Power On” Your Xbox One controller and Hit the Xbox Button
3. Choose the “System” and hit the “Settings”
4. Next to that, you must click on “Devices and Streaming” and hit “Accessories” under the given category
5. Now, you have an option to select the controller you intend to update
6. Before selecting the Firmware version, you need to click on “Device Info”
7. Upon clicking the “Update Now” button, the firmware update gets started to install
Update Xbox One Controller using a USB Method
For controllers, which were purchased before June 2015, required to update using a wired connection. You can go with the wireless method if you purchased the controller after June 2015. To update your controller using the USB method, you need a USB cable used for phones, cameras, and other accessories. You can easily identify controllers bought before June 2015 by finding the lack of a 3.5mm headphone jack on the controller’s bottom. Following the given steps to start updating your Xbox One Controller:
1. Make sure your Controller is connected with the Internet and you have a USB cable
2. If you set your device for installing update automatically, the required firmware update will appear ahead of you
3. If the instruction for the update doesn’t appear, then you should hit the “Xbox” button on your controller
4. Choose the “Settings” and go with “Settings”
5. Next to that, you need to click on “Devices and Streaming” and then “Accessories”.
6. Choose the Xbox One Controller you intend to update
7. One you detect, click on “Device Info” and choose the “Firmware Version” Box
8. Hit the Continue button to start installing the firmware update
Update Xbox One Controller using Your PC
Microsoft Windows makes your life easier by introducing Xbox Accessories App on Windows 10. You can easily install the firmware update of any Xbox Controller by easily following the given steps. Before starting, ensure your PC is connected with the Internet. The first method is for those users who purchased their controllers after June 2015, while the second method is for those who bought their controllers before June 2015.
1. Ensure Xbox Accessories App is installed on your PC; if not, you can easily get it by visiting the Microsoft Store.
2. Connect your Xbox One Controller to your PC. At that time, you need to confirm what kind of controller you have; if you have a wireless controller, then you have two options to connect your controller with the PC, such as a USB Cable and the Xbox Wireless Adapter
3. When done, run Xbox Accessories App and a pop-up will appear if any update is required to be installed saying “Update Required”
4. Click on the button to install the update
You Should Know:
You should keep in mind that the Xbox Accessories App is only available on Windows 10. Controllers purchased before 2015 lacks a build-in 3.5 mm audio port and can be updated using a USB cable. You can’t update the controller using Bluetooth connection and you have an option to modify the Xbox Elite Wireless Controller Series 2 using the Xbox Accessories App.
If you are trying to update the Xbox One Controller that has been already the latest firmware update installed, the screen will be ended within a few seconds to indicate that the required update is already installed. After having three possible options, you can easily update your Xbox One Controller for the better and smooth gaming experience.
Related Tips & Guides
Hot Articles
- 4 Tips to Fix Nvidia Control Panel Missing Issues on Windows 10
- How to Fix PUBG Lag/Delay [PC Version]
- How to Fix AMD Radeon Graphics Cards Black Screen Issues
- How to Download and Use Logitech Gaming Software
- [Solved] How to Fix Nvidia Driver Crashing on Windows 10/8/7
- How to Update AMD/Nvidia/Intel Graphics Driver for Better Gaming Experience
- How to record gameplay on Windows
- How Much RAM Do I Need for PC Gaming
- How Does Reshade Affect Gaming PC Performance?
- About Smart Game Booster
- About US
- Online Feedback
- User Manual
- FAQs
© 2023 Smart Game Booster. All Rights Reserved
