Home > Blog > Tips to Fix Steam Errors: Could not connect to Steam Network
Tips to Fix Steam Errors: Could not connect to Steam Network
We focus on troubleshooting techniques, not just restarting the Steam. Here are some straightforward tips to fix Steam errors: Could not connect to Steam Network.
by Jennifer | Jan 13, 2022
While releasing the Steam Client, you may experience a network issue that refuses you to connect the Steam Network. The error appears whenever you try to log-in to your account. As usual, you can get rid of all types of errors by merely restarting or re-installing the Steam, but you should focus on other troubleshooting techniques also to solve your issue once and for all. Before making any action, once assure Steam servers aren’t down.

Another action you must take is that to log in your Steam account via the website to check your account is working properly and steam hasn’t banned it. Let’s started with a simple solution, whenever you discover such type of error, try to power-up your system, as well as network, and after 30 seconds make them on to see is your problem gets solved or not. If the problem is still there, then try to use Steam client in offline mode and then take it online to solve the connecting problem.
If your problem is still, then we have compiled a list of four possible solutions which are the following:
- Try to Change the IP (Internet Protocol) that Steam uses
- Use Troubleshoot feature to detect the issue
- Check Your Internet Connection Works Well
- Reinstall Steam Client
- Try to Change the IP (Internet Protocol) that Steam uses
- Use Troubleshoot feature to detect the issue
- Check Your Internet Connection Works Well
- Reinstall Steam Client
Try to Change the IP (Internet Protocol) that Steam uses
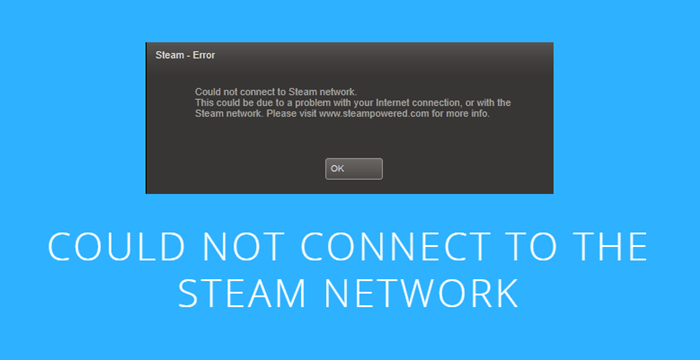
If you find such type of error message below, you are most likely dealing with software and network issue. No one knows as it could be anything from a network problem a Steam update, to even damaged entries. One of the most prominent reasons for this likely cause is because of not connecting to Steam by entering a bad password. The application shows a different password for inputting incorrect passwords as shown in the image below.
The UDP (User Datagram Protocol) is used by the Steam Client to transmit data. However, the protocol sometimes becomes unstable and in return display you an error. In this case, you should try to change your protocol from UDP to TCP (Transmission Control Protocol), which is more stable, reliable, and faster as compared to UDP. Upon having an error “Couldn’t connect to the Steam Network”, try to change it by following the method given below:
1. For sure, there’s a Steam shortcut on Desktop. Make a right-click on Steam’s Icon, and choose properties.
2. Next to that, click on the Shortcut Tab.
3. A dialogue box will be there right after “Target,” try to add “-tcp” at the end of the link to switch the protocol.
4. Now, launch Steam Client to see that the error is fixed or not.
Use Troubleshoot feature to detect the issue
Before going with any solution, try to check your network status would be a good option. You can check network status by simply clicking on the internet icon available in the task right before time. Right-click on Internet Icon, go with “Open Network & Internet Settings.” You also need to check the network hardware like Router, Adapter, and Modem is working well.
Check Your Internet Connection Works Well
Additionally, the issue may be appearing because of a bad internet connection; therefore, you should check at once either your connection is stable or not. It’s quite simple to check and requires a few steps to detect the issue. First of all, if you don’t have much information about your PC, a straightly open browser and type something to check that your computer is connecting with the internet or not. Secondly, you can check your network adapter, how?
1. Hold “Windows Key” and press “X” to open a context menu and left-click on “Device Manager.”
2. The windows display you a popup containing several choices, from which you have to navigate the Network Adapters and expand by merely clicking on it. Next to that, you will discover a list of WIFI/LAN adapters with their titles.
3. Next to that in the third step, you must double click on any adapter to check properties whether the device is working properly. You should check all available adapters one by one.
4. Mistakenly, if you made any change to your network connection, you should revert them by typing the given commands. Hold “Windows Key” and Press “R” to launch the Run box, and type “cmd” and hit enter.
5. Now, in the last step, type all the given commands and press “Enter” after each one:
· Netsh in tip set DNS
· Ipconfig/all
· Ipconfig/release
· Ipconfig/renew
· Ipconfig/flushdns
· Netsh winsock reset
6. After checking all of your commands, you should make a restart to your PC and check whether your problem is get solved.
Reinstall Steam Client
Chances are there that some faulty files take place in Steam and lead you to an error “Could not connect to Steam network error.” You may get rid of this error by merely uninstalling Steam client from your PC and then re-install it to see whether the problem gets resolved or still existed there.
· If you have lots of games and applications downloaded on your Steam Client, then you should make a back-up before uninstalling the program to prevent data loss. Go to the primary drive where Steam client is installed, find a folder, “Steamapps” and move it from Steam Directory to a safe place.
· Hold “Win” key and press R simultaneously to launch Run box and then type “Control” and press enter once run box appeared.
· Hit “Programs & Features” and find the Steam program to uninstall. Once Steam gets completely removed, restart your PC and download the Steam client from the official Site.
· After installing the Steam Client, try to restore your Backup by moving the file “Steamapp” to the Steam directory and release the Client to see that the error is gone.
Related Tips & Guides
Hot Articles
- 4 Tips to Fix Nvidia Control Panel Missing Issues on Windows 10
- How to Fix PUBG Lag/Delay [PC Version]
- How to Fix AMD Radeon Graphics Cards Black Screen Issues
- How to Download and Use Logitech Gaming Software
- [Solved] How to Fix Nvidia Driver Crashing on Windows 10/8/7
- How to Update AMD/Nvidia/Intel Graphics Driver for Better Gaming Experience
- How to record gameplay on Windows
- How Much RAM Do I Need for PC Gaming
- How Does Reshade Affect Gaming PC Performance?
- About Smart Game Booster
- About US
- Online Feedback
- User Manual
- FAQs
© 2023 Smart Game Booster. All Rights Reserved


