Today, many PC gamers struggle with CPU bottlenecks. It’s normal; when your processor can not keep up with the graphics card, the entire system can suffer, resulting in unstable frame rates, noticeable stutters, and reduced gaming performance. So, how to fix CPU bottleneck?
This guide will introduce 8 effective methods that truly work. You can also find the best free game booster to optimize system resources and reduce CPU bottlenecks without investing in new hardware!
What is a CPU Bottleneck?
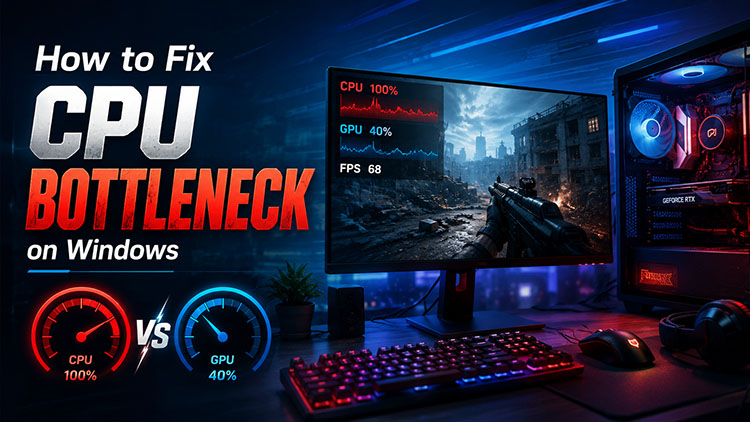
A CPU bottleneck is a performance limitation that occurs when the CPU can not process game data fast enough to keep up with the GPU. Even if you have a powerful graphics card, it may remain partially idle while waiting for the CPU to provide the data it needs.
Several factors can cause a CPU bottleneck, for instance, an older processor, CPU-intensive games, slow RAM, and background processes that consume CPU resources. It can also occur when a powerful GPU significantly outpaces the capabilities of the CPU.
How to Identify a CPU Bottleneck (Common Signs)
Before diving into how to fix CPU bottlenecking, it’s important to first identify whether your CPU is actually limiting gaming performance. Look for these common signs:
High CPU & Low GPU Usage: Task Manager/hardware monitoring tools show CPU usage consistently near 90-100% while GPU stays well below 80-90%.
Unstable Frame Rates & Stuttering: FPS fluctuates significantly even after lowering graphics settings, resulting in noticeable stutters or inconsistent gameplay.
FPS Drops: Average FPS may look acceptable, but sudden frame-time spikes cause dips in 1% low FPS and make gameplay feel less smooth.
Background Tasks Spike CPU Load: When you open a browser or other applications, CPU usage suddenly increases and causes a noticeable drop in game performance.
If you notice any of these signs, it’s time to address the issue. Keep reading to learn how to fix a CPU bottleneck for smoother, more consistent gaming performance.
8 Proven Solutions on How to Fix CPU Bottleneck
In this part, we will introduce 8 practical methods that can fix CPU bottlenecks. Just check them out!
1. Lower CPU-Heavy In-Game Settings
The first and simplest CPU bottleneck fix is to tweak your in-game settings, especially for CPU-heavy titles. Here’s how to fix a CPU bottleneck via graphics adjustments.
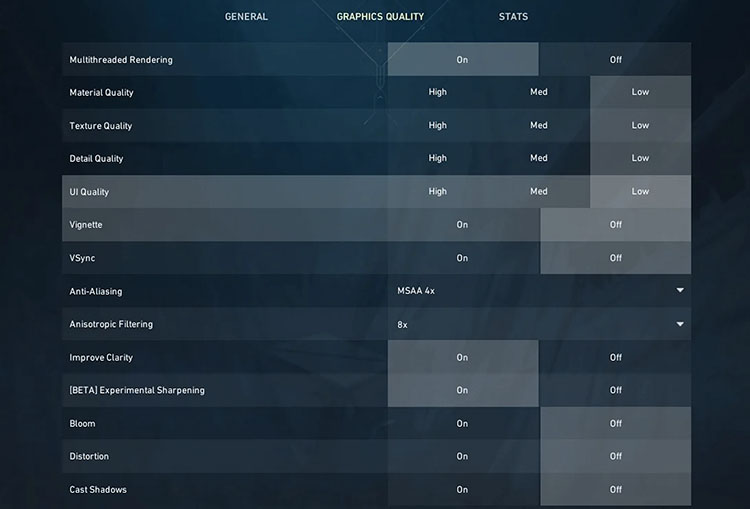
Step 1. Launch Valorant and open the settings menu. Go to Graphics Quality.
Step 2. Apply recommended low-CPU settings:
Set Multithreaded Rendering to On.
Set Material Quality, Texture Quality, Detail Quality, and UI Quality to Low.
Set VSync to Off.
2. Free up CPU & RAM Capacity (Close Background Tasks)
Background applications can silently consume CPU cycles and memory while you are gaming. In this case, Smart Game Booster is your go-to choice. It can close unnecessary background processes and apply system optimisations, which helps you free up CPU and RAM usage and boost PC performance.
Key Features of Smart Game Booster
- Enjoy lag-free & low-ping gaming
- 100+ games supported
- Severs from all over the world
- Boost in-game FPS
How to Fix CPU Bottleneck with Smart Game Booster
Step 1. Free download & install Smart Game Booster on your Windows PC.
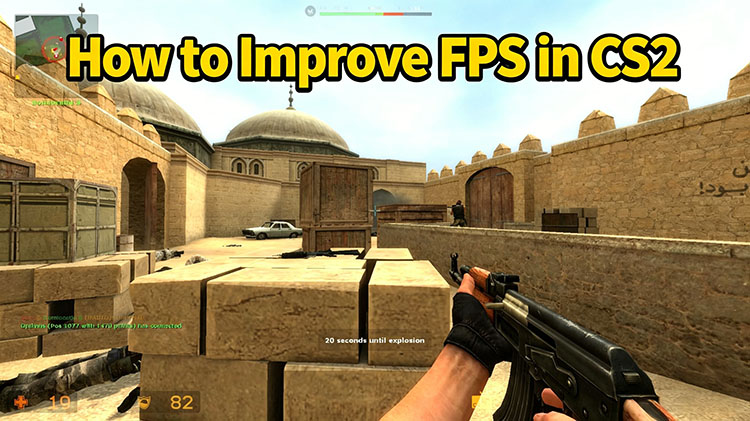
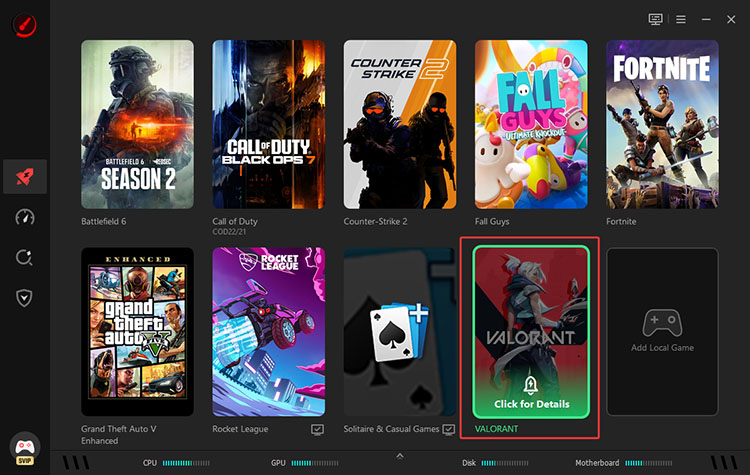
Step 2. Choose Valorant to enter game details. You can also apply a CS2 CPU bottleneck fix with it, as it supports the game natively.
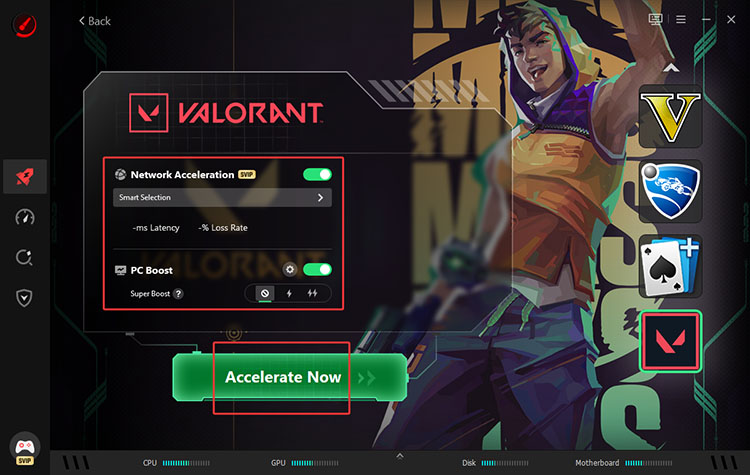
Step 3. Enable PC Boost and click Accelerate Now. (You can enable Network Acceleration to choose an optimized node for Valorant.)
Step 4. Smart Game Booster will optimize your computer before launching the game. Click Launch Game without CPU bottlenecks.
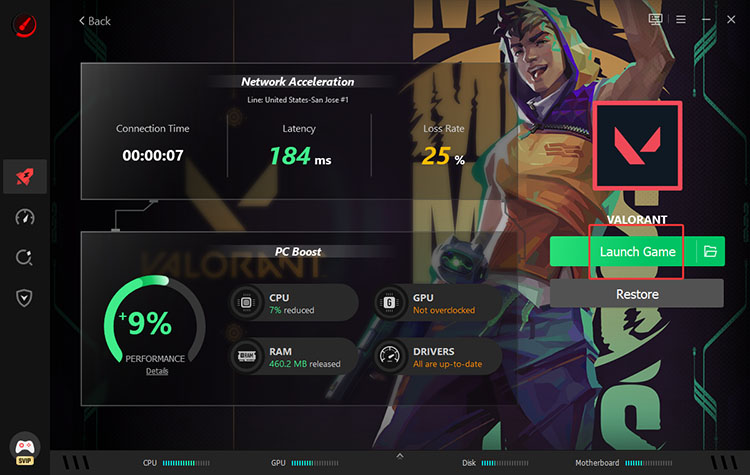
Tip: Smart Game Booster supports a wide range of games for optimization. It’s also a useful PUBG lag fix that can help you improve your gaming experience!
With Smart Game Booster, You Can Enjoy:
With one click, you can instantly free up CPU capacity and reduce RAM usage. This powerful FPS booster gives your games the resources they need for smoother performance.
It comes with powerful tools designed to improve gaming performance. For instance, System Clean, Performance Tweaks, Driver Update, and Game Defrag.
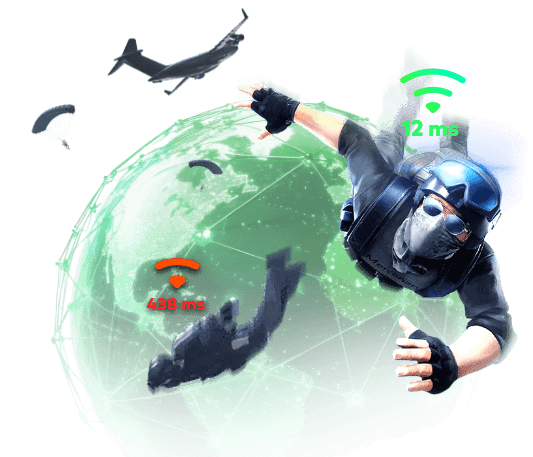
Its smart server region selection and network optimization act as a built-in ping reducer. It can help deliver more stable internet connections for lower latency in online games.
Smart Game Booster displays live CPU and GPU usage, in-game FPS, RAM consumption, and hardware temperatures. You can monitor system performance and see how your PC responds to different optimizations.
It also offers built-in antivirus scanning, firewall protection, and account guard features to keep your system safe from threats.
3. Enable XMP / EXPO for RAM
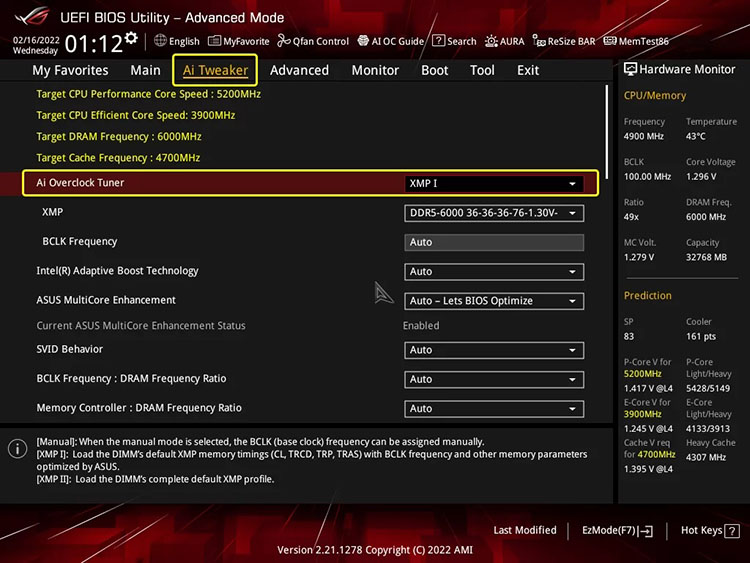
XMP (Extreme Memory Profile, Intel) and EXPO (Extended Profiles for Overclocking, AMD) are profiles that let your RAM run at its advertised higher speeds. Here’s how to fix CPU bottlenecking by enabling them.
Step 1. Enter the BIOS/UEFI and locate the XMP/EXPO option.
Step 2. For ASUS: Advanced Mode > Ai Tweaker > Ai Overclock Tuner. Select XMP 1.
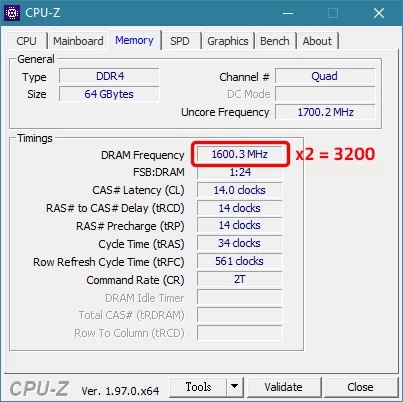
Step 3. Reboot your PC. Press the Windows key, type CPU-Z. Go to the Memory tab > confirm DRAM Frequency × 2 matches your RAM kit’s rated speed.
4. Set Your Game or App Process to High Priority
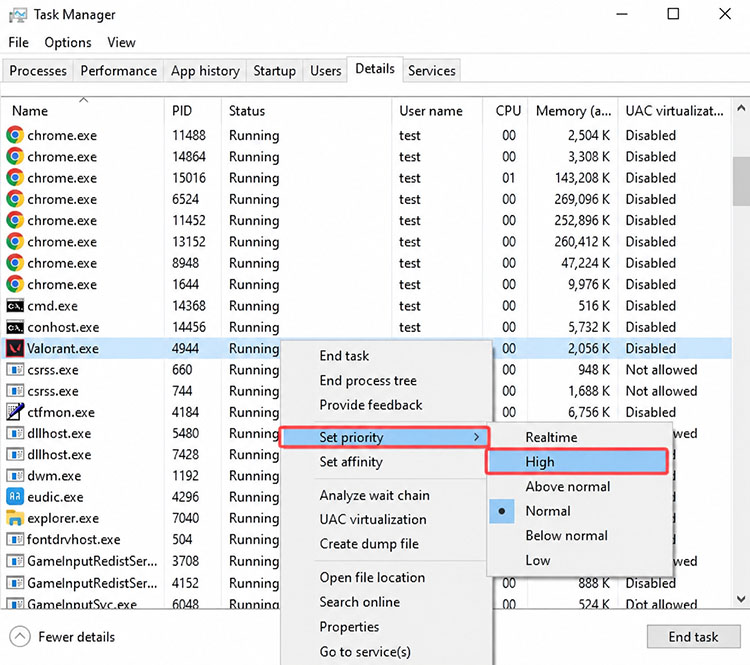
Windows may not always allocate maximum CPU resources to your game, but you can adjust the priority to make it. Here’s how to stop CPU bottlenecking via Task Manager.
Step 1. Open Task Manager > Processes.
Step 2. Right-click on the game process and choose Set Priority > High.
5. Increase In-Game Resolution
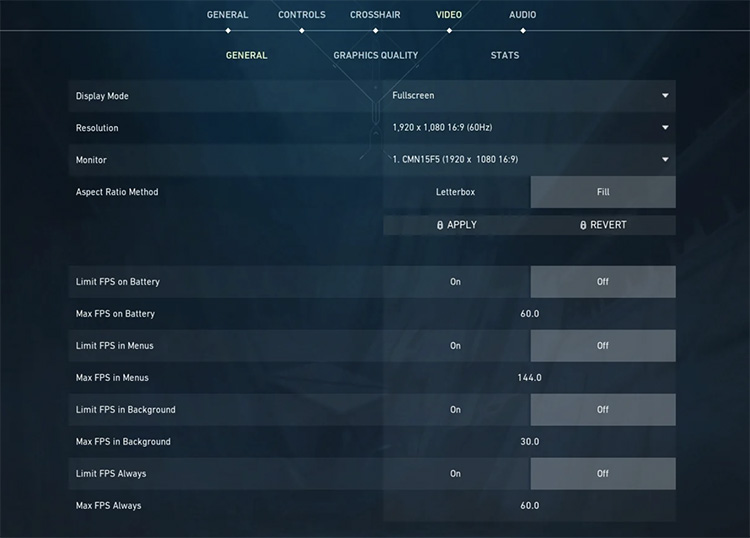
Higher resolutions shift more workload from the CPU to the GPU, which helps create a better balance, and you can also see image sharpening for games. Here we will use Valorant as an example.
Step 1. Go to the Video tab and select General.
Step 2. Increase the resolution if your GPU supports it. Set Display Mode to Fullscreen. Apply the changes and test performance.
6. Overclock the CPU (Safely)
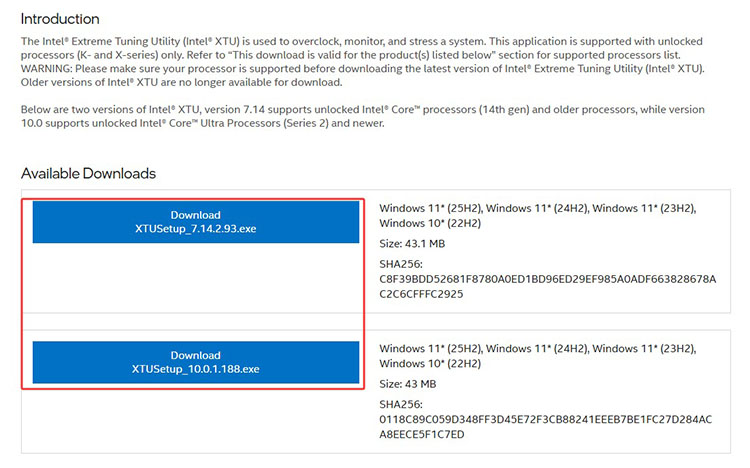
Overclocking means raising your CPU’s clock speed beyond the stock specifications for extra performance. Here’s how to fix CPU bottleneck by overclocking with Intel XTU.
Step 1. Download and install the Intel Extreme Tuning Utility (XTU). Also install a monitoring tool like HWiNFO/HWMonitor.
Step 2. Run the built-in benchmark once to record your baseline performance and temperatures.
Step 3. Switch to the Advanced Tuning tab. Locate the core ratio sliders. Use the arrow to raise all cores together by +1. Click Apply.
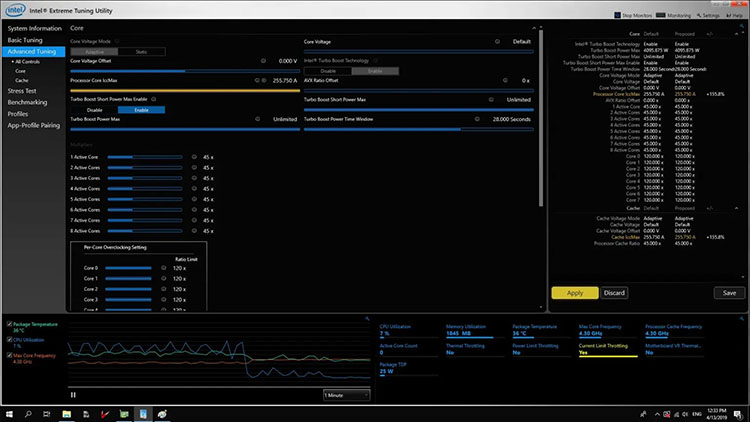
Step 4. Run a short stress test (5-15 minutes). Watch temperatures carefully; keep them under your CPU’s safe limit (usually 90-95°C under load).
Step 5. If the system is stable, increase the core ratio(+1) and repeat the test. When the system becomes unstable, drop back to the last stable multiplier. Save the highest stable settings.
7. Update BIOS and Chipset Drivers
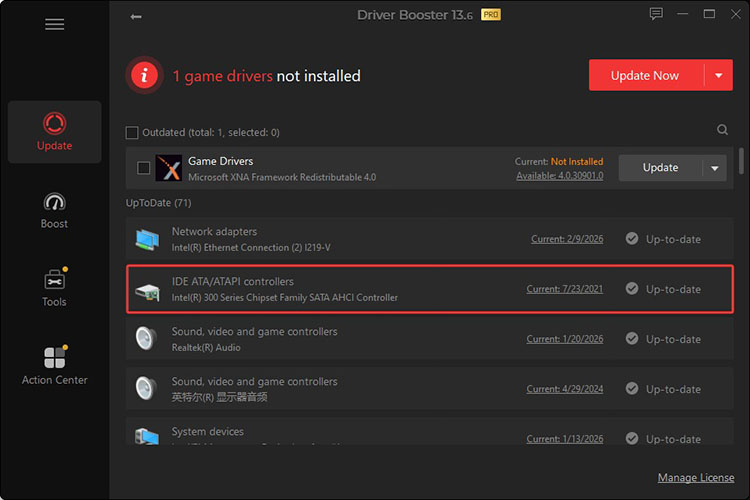
Outdated BIOS firmware and chipset drivers can affect CPU performance and RAM compatibility. Therefore, you might want to keep them updated to ensure your processor works efficiently with your motherboard. Here, IObit Driver Booster is the best choice to update outdated/missing/faulty drivers easily.
Here’s how it works.
Step 1. Get IObit Driver Booster from the official website.
Step 2. Click the Scan button to scan all your installed drivers.
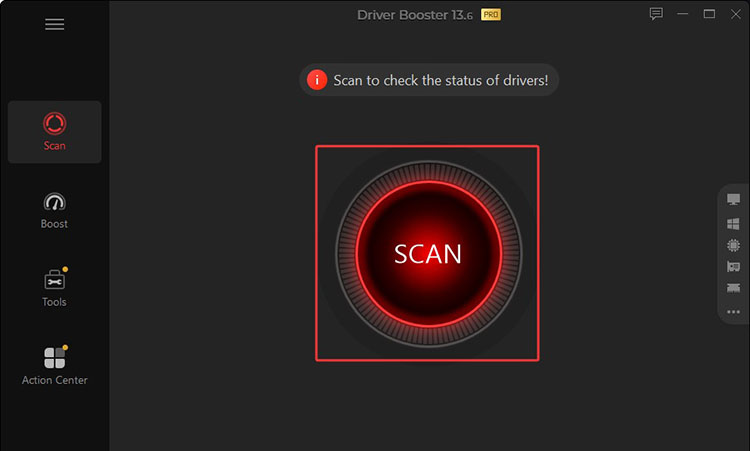
Step 3. It will list all the drivers that need to be updated. Click the Update Now button in the top right.
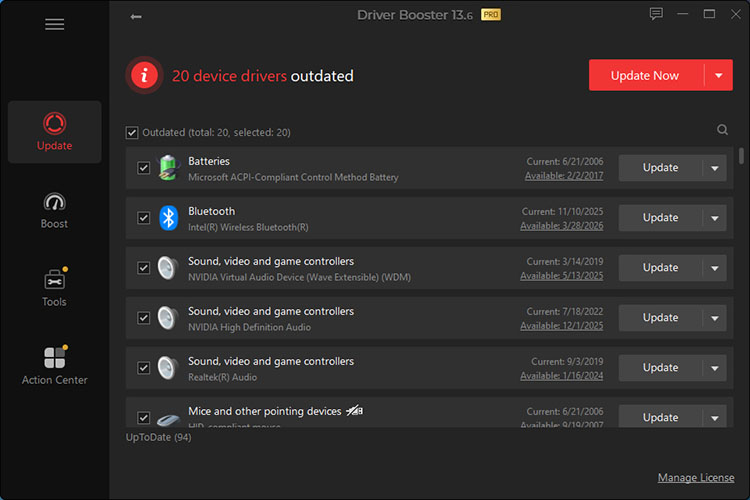
Step 4. All the selected outdated drivers will be updated to the latest version.
Tip: Want to reduce gaming lag and improve overall performance? Check out our guide on how to reduce lag in Roblox to learn more.
8. Upgrade Your CPU (Ultimate)
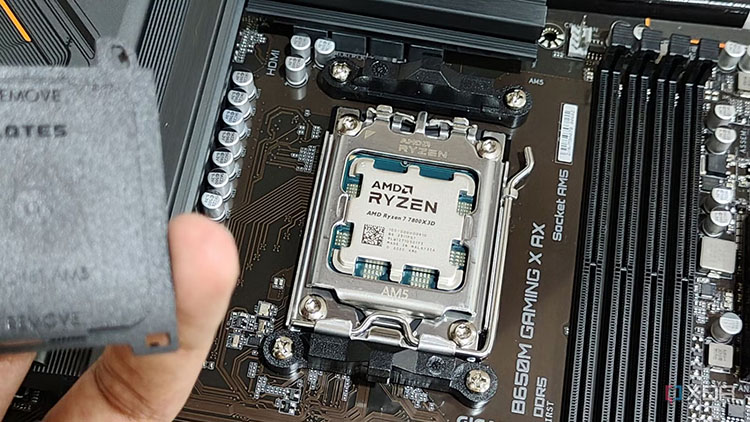
If previous methods do not solve the issue, it might be time to upgrade your CPU. Here’s how to upgrade your CPU for better performance.
Step 1. Check your motherboard’s socket and chipset, then choose a compatible CPU.
Step 2. Shut down your PC, remove the side panel, detach the CPU cooler, and remove the old processor.
Step 3. Install the new CPU, secure it in the socket, reinstall the cooler, and reconnect your PC.
Practical Tips to Prevent Future CPU Bottlenecks
If you have read this far, now you should know how to fix CPU bottleneck with 8 proven methods. In this part, let’s check some practical tips to keep your CPU running smoothly.
Balance Your CPU-GPU Budget: Choose a balanced CPU and GPU based on your gaming needs.
Prioritize Single-Core Speed: Prioritize strong single-core performance and higher clock speeds for CPU-intensive games.
Use Fast Dual-Channel RAM: Use fast dual-channel RAM to improve bandwidth and CPU performance.
Target Higher Resolutions: Use higher resolutions to shift more workload toward the GPU, reducing CPU bottleneck effects.
Keep Drivers & BIOS Updated: Keep drivers and BIOS updated to maintain compatibility and improve system performance.
Final Thoughts
How to fix CPU bottleneck? Now you should know all the solutions. If the CPU remains the limiting factor, overclocking or upgrading to a more powerful processor is a more viable solution. As the guide shows, Smart Game Booster is the simplest way to optimize the gaming experience on Windows. Just get it to fix annoying CPU bottlenecks and enjoy smoother gameplay from now on!
Key Features of Smart Game Booster
- Enjoy lag-free & low-ping gaming
- 100+ games supported
- Severs from all over the world
- Boost in-game FPS